Training Page:
OSD Menu Options: COR-598HIM Security CameraSetup Menu
Menu Options and Sub-Menu Option Explanations
You can reach the OSD menu by clicking the mini-joystick (or "control nub). Move the mini-joystick left/right, up/down to move through the selections and to page through various options. Select an option by "clicking" the mini-joystick.
NOTE: Most of the menus explained below contain one common option - EXIT JUMP. This option, when selected, will exit the particular menu you are using and take you all the way over the right hand menu (the EXIT menu), where you can select EXIT, SAVE&EXIT, or return the camera to its factory default settings.
SPECIAL Menu

The EXPOSURE top-level menu contains selections that directly effect the lens, iris, and digital-signal processing (DSP) circuits that control backlight compensation and white balance, among other video signal parameters.
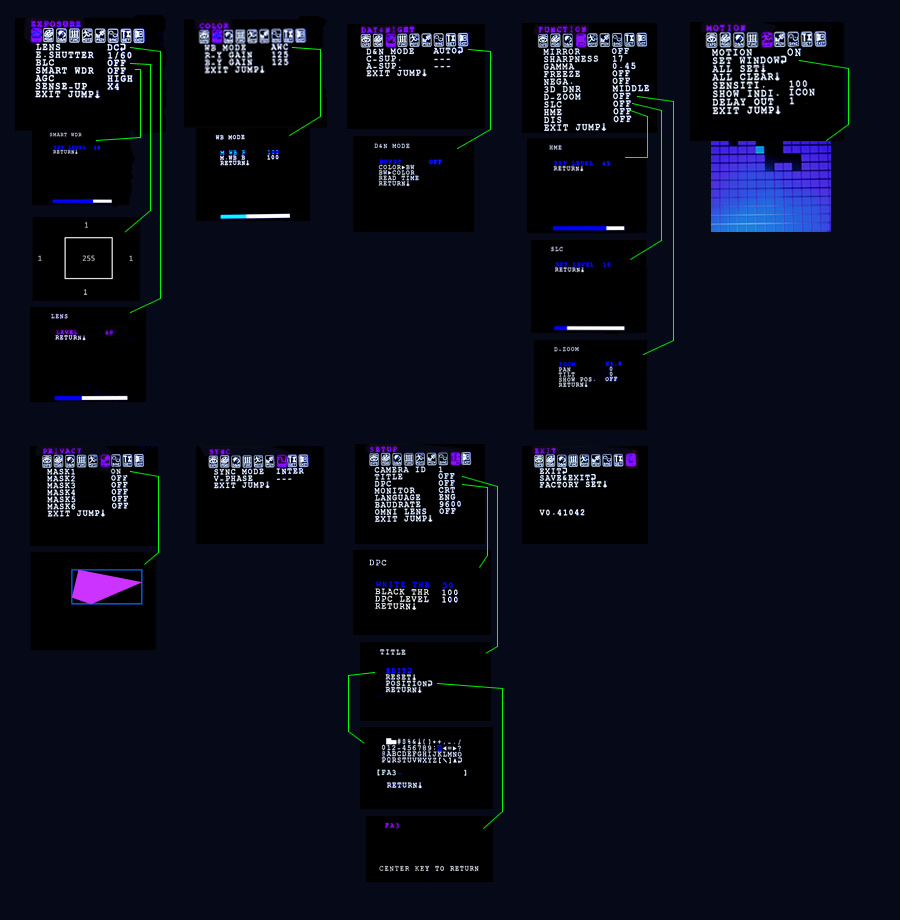
LENS - The LENS selection contains two options, DC and MANUAL. Both options take you to the sub-menu shown at right. This option effects the amount of light reaching the lens, and is indicated by the slide bar at the bottom of the screen and a number you can use for reference.
E. SHUTTER - This camera uses an electronic shutter (as do most CCTV cameras with a CCD video sensor). You can adjust shutter operation from 1/100,000 sec. to as high as X256. Settings higher than X2 may be useful in extremely dark environments but may adversely effect video quality.
BLC - Backlight compensation is a method of controlling strong background sources of light that would otherwise wash out the video image and make it unusable. Backlight compensation can be applied to the top third, the bottom third, and three equal portions in the middle of the field of view (FOV). Each of these 5 different zones can have a different level of backlight compensation applied.
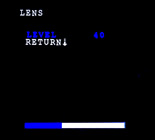
The BLC setting has two options, OFF and ON. When ON, the sub-menu at right can be reached. Not the boxed portion in the middle of the screen that shows a BLC level of 255. The top, bottom, left and right zones show a BLC level of 1. By using the mini-joystick you can move the active portion of control to any of these zones and adjust BLC level individually. When you are finished, "click" the mini-joystick to exit this screen and save your settings.
NOTE: BLC can not be adjusted if you are using SMART WDR settings, as explained below.
WDR allows a security camera to filter intensebacklight surrounding a subject and thus enhance the ability to distinguish features and shapes. WDR effects are best used in situations where light enters an FOV from various angles such as a multi-window room. It essentially combines a short exposure image with a long exposure image and enhances the result. This lets the camera see through the intense sunlight or artificial light and produce a useful image. Without WDR the image would be washed out. This is a common situation in restaurants, stores and other businesses that have big glass windows.
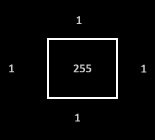
If you turn SMART WDR on you can reach the sub-menu shown at left. The level of SMART WDR applied to the image is indicated by the slide bar. Like the LENS selection, a number is also indicated for reference. Unlike the BLC menu selection this effect is applied to the entire FOV, not portions or zones, and can only be turned on/off globally.
AGC - Automatic Gain Control. This is the standard signal control method you are probably already familiar with from other video and digital imaging products. You can select a HIGH, MEDIUM, or LOW setting or turn AGC off.
SENSE UP - This is a method ofdigital slow shutter. The same effect is also available in the E. SHUTTER setting selections (see above). It can force the electronic shutter to collect maximum amount of light and should be used with caution in only the darkest surveillance environments. Incorrect use will create unusable video. Correctly used, SENSE UP can provide good imaging in near total darkness but can have drawbacks. Click here for a full discussion of SENSE UP and other digital slow shutter methods.
SENSE UP can be turned off completely or you can turn it on in increments up to X256.
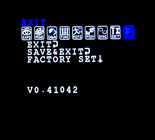
EXIT JUMP - Takes you to the EXIT sub-menu, shown at left. You can EXIT, SAVE & EXIT, and FACTORY SET, which returns the camera to its factory default settings. This sub-menu also displays the cameras firmware version, which can be an aid in troubleshooting.
Select EXIT to leave the OSD without saving any new settings since last time you saved changes.
The SAVE & EXIT option is self explanatory.
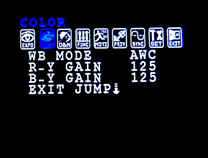
WB MODE - White Balance Mode. AWC, ATW, MANUAL and PUSH selections are available. AWC and ATW are both automatic white balance modes and require no user intervention.
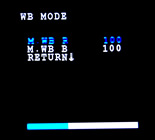
MANUAL mode allows you to manually set the white balance by adjusting red and blue saturations levels, which will then remain locked on your settings. When you set WB MODE to MANUAL, you get the sub-menu at right. The two settings shown - M WB R and M WB B - can be changed by moving the mini-joystick left/right. The slide bar at bottom of the screen gives you a visual indication and a level number is also displayed for reference.
PUSH mode is provided as a custom method of setting white balance and can be useful in some environments. As any photographer will tell you, a white object may not photograph as white depending on the ambient light. Using this mode you can "teach" the camera to show white even if the "white" object appears grey, beige, or some other tint (when viewed with the human eye) due to the nature of the light in the room.
When PUSH mode is on-screen, click the mini-joystick. The camera will "read" the field of view and adjust white balance using that image as a reference point for the color white. When using PUSH mode the user should point the camera at a solid white image (or hold a white card or paper in from of the camera) before clicking the mini-joystick. This will provide the truest white color reference point.
All WB modes allow you to adjust R_Y GAIN (red gain) and B_Y GAIN (blue gain) to fine-tune your color setting if necessary.
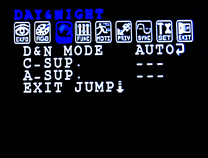
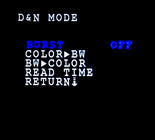
This menu presents three selections - COLOR, BW, and AUTO, which has it's own sub-menu, shown at right.
For COLOR and BW settings the camera is locked into that video mode and will produce ONLY that video mode at all times. Locking the camera into COLOR mode may require you to fine tune other settings, such as shutter and sense-up (located in the EXPOSURE menu, discussed above), to produce a quality video picture under a wide range of lighting conditions.
When you set D&N MODE to AUTO, you can select two additional parameters, BURST and READ TIME.
BURST effects the way the camera references color data. You can set this to ON or OFF. Depending on your surveillance setting and available light and other factors, including an external SYNC signal (not currently an available option) you may not see any visible effect regardless of this setting.
READ TIME selects how long the camera delays when switching between night and day video modes. This can be useful in some lighting situations where shadows fall over the camera. If the delay is too low, the camera may switch to night mode while the shadow is there and then switch to day mode when the shadow is lifted, which will cause momentary disturbances in the video output, which is usually undesirable. If the shadow happens a lot the camera will "flail" between modes and won't be very useful. Setting a high delay time is useful in those situations.
Other options shown in this menu - C-SUP and A-SUP (color suppression and aperture suppression) - and sub-menu - COLOR>BW and BW>COLOR (individually configurable delay times for switching from one mode to another) - are not implemented in this firmware version.
Function Menu Settings
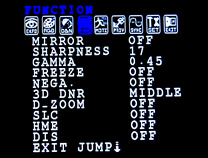
The FUNCTION menu contains many user configurable options.
The MIRROR option offers you MIRROR, V-FLIP and ROTATE settings (as well as OFF). These settings effect the orientation of the video image and can be useful if you need to place the camera in an unusual or awkward position.
SHARPNESS effects picture quality and can be set in a range of 1 to 49 (a slide bar appears at the bottom of the screen when you adjust this setting).
GAMMA, like SHARPNESS, is another picture quality parameter but relates to color. It has the options of USER and some set numeric values. USER makes the GAMMA setting effectively automatic. The numeric settings can be used to adjust color saturation.
FREEZE locks the current image on-screen (not including the OSD menu overlay). It can be turned ON or OFF.
NEGA. can be turned ON or OFF. It inverts the colors in the video picture. Sometimes this effect can be used to enhance details that would otherwise be difficult to see.
3D DNR stands for 3-Degrees Digital Noise Reduction. You can turn it OFF or set it to LOW, MEDIUM, or HIGH.
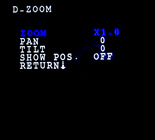
D-ZOOM provides it's own sub-menu, shown at left, when it is turned ON. You can digitally zoom the image from x1 (normal) to x3 magnification. During magnification you can use the PAN and TILT options to move the viewable "window" around the screen. The SHOW POS. option, when turned ON, provides an on-screen icon that indicates what area of the magnified field of view you are observing.
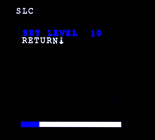
SLC controls brightness in the corners of the video image. This can be useful particularly when using CRT monitors, since the edge and corners of CRTs can often appear darker than the rest of the screen.
SLC has it's own sub-menu, show at left. A slide bar indicator appears at the bottom of the screen along with a numeric value for reference. Select RETURN when satisfied with your setting.
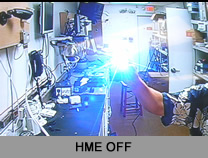
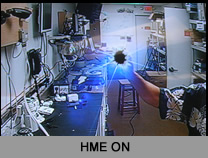
HME invokes high intensity light suppression technology that was developed to handle light sources pointed directly at the camera, such as headlights coming up a driveway or arriving in a parking in front of a store. This type of light can disable some CCTV cameras (older cameras can be very susceptible to this). HME EXipses the light source with a dark gray mask. Note the two similar images at right. Both images show a flashlight directed into the camera lens. The top image was taken with HME off. The bottom image was taken after turning HME on. Note the eclipsed light source and the diminished light-haze surrounding it. When properly configured and adjusted, HME can be very useful in capturing license plates and other details at night.
DIS is a stabilization feature. You can turn it ON or OFF. Use this feature if the camera is subject to vibration from the mounting surface (pole or wall), such as when a door slams or heavy trucks pass on the street outside.
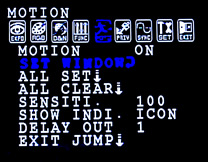
The first selection in the MOTION menu can be used to turn the function ON or OFF. This is a global setting.
The next three selections - SET WINDOW, ALL SET and ALL CLEAR - are used to designate special areas of the field of view (FOV) as motion trigger zones, or the entire FOV as a motion trigger zone, or clear the entire FOV from any motion detection function (wiping the screen clear, usually done to start over since you could just as easily turn the motion detection function off using the MOTION setting).

SET WINDOW brings up a sub-menu that fills the screen with a grid-like pattern of small squares, as shown at right. The purple squares represent areas of the screen where motion detection is active. The cyan colored square is the current cursor position. The black squares represent areas where motion detection has been turned OFF. Move the cursor from square to square using the mini-joystick. Select or de-select a square by clicking the mini-joystick. When satisfied, move the cursor to the bottom right or bottom left corner and then move it off-screen. Your selection will be saved and you will be returned to the MOTION detection screen.
Adjust motion sensitivity using the SENSITI. selection. Set it from 0 to 120 (minimum to maximum sensitivity).
The SHOW INDI. selection has three settings, OFF, ICON, and TRACE. OFF is self explanatory. ICON will make a small icon appear in the upper left corner of the screen when motion is detected. TRACE will create a pattern of flashing squares that follow the moving object. This can be useful if you are trying to find very small objects (or object) moving on the screen which may be hard to pick out from background objects or colors, patterns, etc.
DELAY OUT controls how long the indicator icon appears on screen, and how long the tracers appear. A low value minimizes on-screen time and a high value does the opposite.
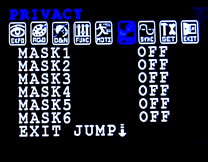
The PRIVACY menu allows you to configure and control up to 6 individual on-screen privacy masks. When a privacy mask is enabled, anything taking place in that area of the screen is not viewable or recordable. This can help prevent troublesome "invasion of privacy"
lawsuits that can result if your camera is directed at a field of view that contains homes, apartments, restrooms or changing room doors, etc., in the background that should expect a reasonable degree of personal privacy that constant monitoring could infringe upon.
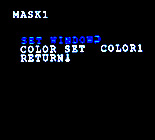
MASK1 through MASK6 operate in the same way. Each one can be turned ON or OFF, and each one can control a uniquely shaped mask.
When you select MASK1, for instance, and turn it on you can reach the sub-menu shown at right. MASK1 through MASK6 each have their own sub-menu and the all look and operate the same.
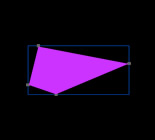
Use the mini-joystick to select SET WINDOW and click it. The privacy mask configuration screen appears, similar to the image at right. The trapezoidal shape represents the mask. Each corner of the trapezoid contains a vector point you can move using the mini-joystick. Adjust the vector up/down, left/right until it is the size and shape you want, then click the mini-joystick. The MASK sub-menu will appear.
Change the color of the mask using the COLOR SET option. Several colors are available. When satisfied, click RETURN and the PRIVACY menu appears.
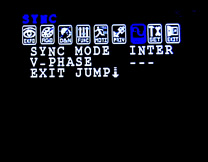
Sync Menu Settings
The current design of this camera does not implement SYNC mode configuration. Future versions may use this feature. Consequently the two settings available - AUTO and INTER(nal) - do nothing.
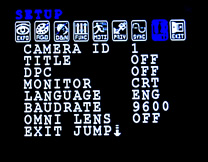
Setup Menu Settings
The Setup menu gives you the ability to add on-screen labels to the video picture so you can easily identify the source of the image
when viewed on a remote monitor or on a recording. It also contains some miscellaneous functions.
CAMERA ID - You can assign a number to the camera, from 1 to 999.
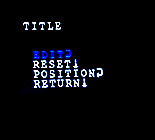
TITLE - More useful than CAMERA ID, the TITLE function let's you name the camera with a descriptive title of your choice. When you turn TITLE ON, you can reach the sub-menu shown at right. Click EDIT and you can select alphanumeric characters, symbols and numbers. When satisfied you can then use the POSITION setting to place your title in a location of your choice on screen. Use the RETURN option when finished.
DPC - Dead Pixel Control. If the camera should ever develop a dead pixel you can use this control to mask out the pixel with either white or black.
MONITOR - Use this setting to select CRT or LCD monitor. Both types have slightly different color levels and brightness characteristics, you can use this setting to get optimal monitor performance.
LANGUAGE - Select from English or Chinese.
BAUD RATE and OMNI LENS functions are not implemented in this version.
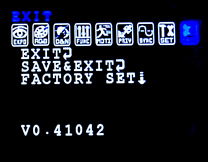
The Exit Menu
The three selections in the EXIT menu are self explanatory.
EXIT - Leave the OSD menu without saving.
SAVE&EXIT - Save setting and exit the OSD menu.
FACTORY SET - Return camera to factory set operating configuration.
This screen also displays the firmware version, which can be useful during troubleshooting.
OUR FOCUS IS YOUR PROFIT
Cortex Security Solutions
OUR FOCUS IS YOUR PROFIT | Cortex Security Solutions
CORTEX Inc. Copyright 2026 -
All rights reserved